CORAL Licensing User Guide
About CORAL Licensing
A component of Hesburgh Libraries locally developed ERM, CORAL Licensing provides a way to store and access digital copies of current and expired license agreements and related documents as well as associated agreement metadata. The licensing module helps make library license agreements more accessible to personnel through select searchable metadata fields and assists institutions in tracking and using specific pieces of information included in legal agreements. CORAL Licensing is a flexible document management system, useful in anticipating a variety of agreements and institutional goals for managing agreements. The module allows users to identify license clauses most important to record and track from an institutional point of view. With related features like a clause comparison function, and ILL and course pack Terms Tool that can be implemented to deliver terms through other systems such as SFX, or EBSCO Full Text Finder, and potentially for Ex Libris (formerly Serials Solutions) the CORAL Licensing module the CORAL Licensing module provides a way to make better use of permissions included in the license agreement.
Please note that screenshots and text in this document are just examples and do not necessarily reflect terms for a particular resource.
Component Overview
CORAL Licensing has seven major components in the main navigation at the top of each page.
- Home
- New License
- Licenses in Progress
- Expression Comparison
- Calendar
- ONIX-PL File Import
- Admin
Home
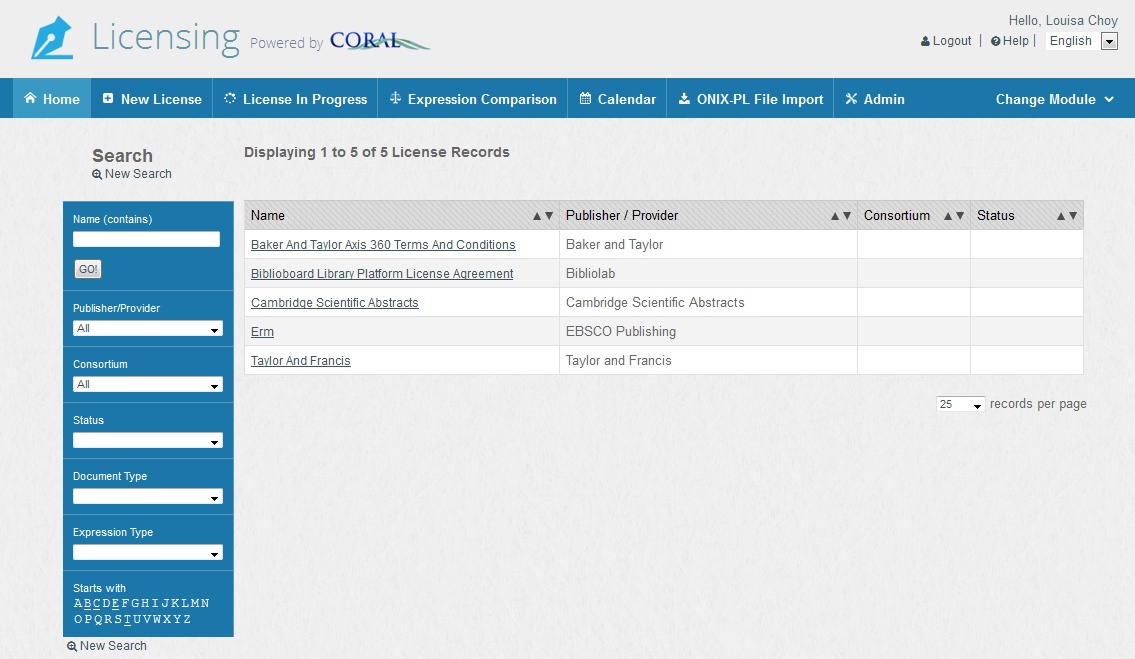 image of home screen for Licensing modules. Search features are on the left and a table of licenses on the right.
The home screen contains a search on the left and a list of license records on the right. The search runs against the following fields: license name, publisher/provider, consortium, license status, document type, and expression type.
New License
Select New License from the main navigation to begin adding new licensing records. This will open the License pop-up window.
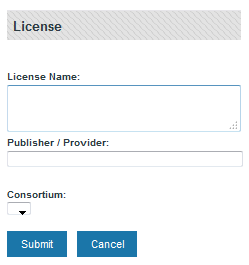 screenshot of Add License form. There are three fields.
- License Name: Name of the license record. A license record can group together all licenses that are either related to each other or related to the same resource. If you have licensed a package of electronic journals from Springer and have over the years collected several licenses and amendments for that package, you can place all of those documents on the same license record. Then, you need to give the license record a name which gives some indication as to the documents found on that record. In this example ‘Springer Online Journals’ may be a valid license name. If you have license documents for Springer eBooks, you can rename the license to something like ‘Springer Online Products’
- Publisher/Provider: Name of the licensing organization. In this example Springer would be the publisher/provider. The publisher/provider field has an auto-fill feature which is populated from the organizations listed in CORAL Organizations.
- Consortium: The consortium through which a licensed resource is obtained. The consortium dropdown is populated with any organization assigned a consortium organization type in the Organizations module.
Adding / Editing New License Record
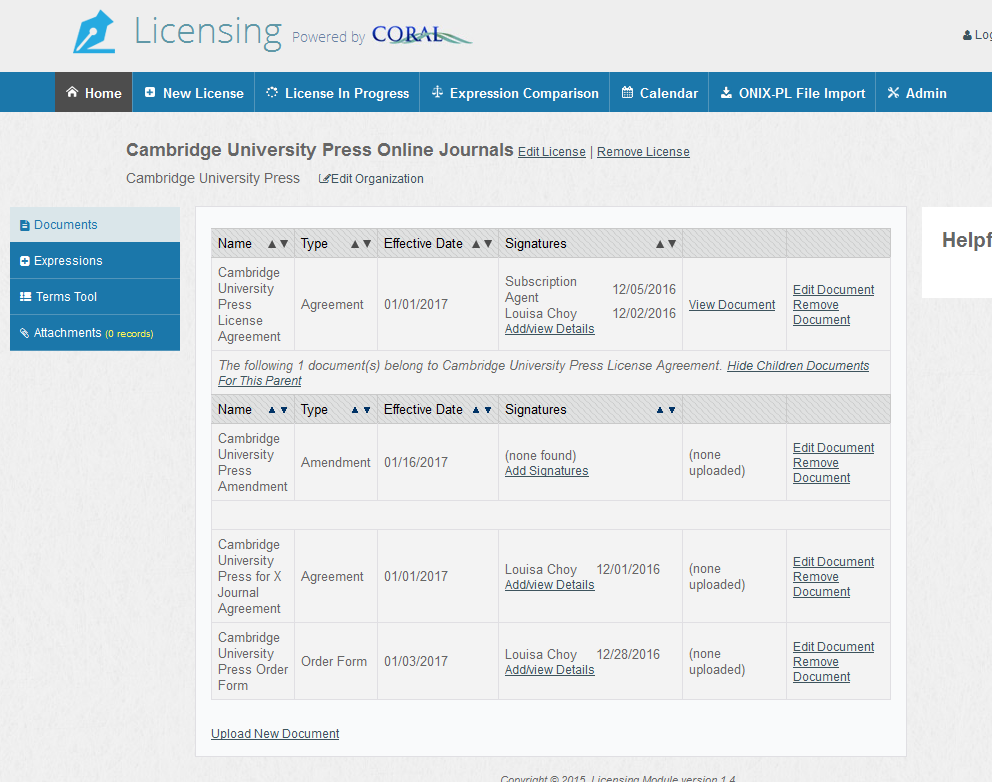 screenshot of the License Record.
Here is a license record which has been created for
‘Cambridge University Press Online Journals’. To the right of the
license name are the options to remove the license or to edit the
name, publisher/provider and consortia. Selecting Edit Organization next to the publisher/provider name takes you to the Cambridge University Press record within CORAL Organizations. To the far right is the License Status dropdown field where you can assign a license record status. CORAL Licensing includes the following default statuses.
- Awaiting Document: License record created but scanned license not yet added.
- Complete: License record is complete, no additional work required.
- Document Only: Document loaded with expressions not identified or loaded.
- Editing Expressions: Document loaded and currently adding license terms/expressions.
- NLR: No license required.
License Status values can be edited, added or deleted through the Admin page detailed later in this document. The default values are simply suggestions for how an institution might consider tracking agreements.
The license record has four sections located on the left-hand column:
- Documents
- Expressions
- Terms Tool
- Attachments
Documents
The Documents tab contains all the documents for each license record. Any document may be uploaded to the system including licenses, amendments, order forms, purchase requests, or any other important document. Select Upload New Document to begin.
Adding New Documents
The Upload New Document link opens the window in the below screenshot. Here you can fill out the initial details of the document and upload the actual file. Document Name is the only required field.
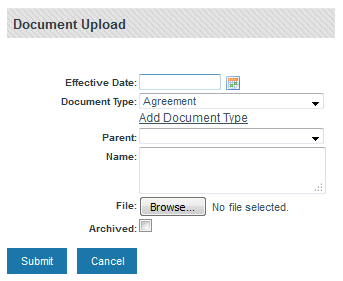 screenshot of Document Upload form. There are 6 fields.
- Effective date: The effective date of the agreement, if identified and available.
- Document Type: Identifies what type of document this is. This is a customizable field which allows each library to set their own terminology. The software comes with the following types included: Agreement, Amendment, Countersigned Agreement, Internal Acknowledgment, Order Form, and SERU. Select the Add Document Type link to add new document types. You can also add a document type by going to the Admin page.
- Parent: Identifies any parent document (ex. You may want to assign a parent document when uploading an amendment).
- Name: The title of the document, usually taken directly from the license document.
- File: Browse and upload a scanned copy of the actual document.
- Archived: Used to identify documents which are no longer current or have been superseded by another agreement. Archived documents are sorted separate from current documents and are collapsed beneath a show/hide link to save screen space. Archiving a document does not delete it from the system. It also does not delete any expressions attached to that document.
Editing Documents
Once added, the documents will display on the Documents tab sorted first by Document Type and then by signature date with most recent first. Multiple signatures for both licensee and licensor can be added using the Add Signatures link. On the right side of the table are links to view, edit, and delete each document.
Expressions
The Expressions tab is where the expressions or clauses of the license are entered. Expressions are not required. You should however assign an appropriate License Status to the record that indicates it is a document only record.
Adding Expressions
The Add New Expression link opens a pop-up window, where you can add expressions for the documents that have been previously loaded.
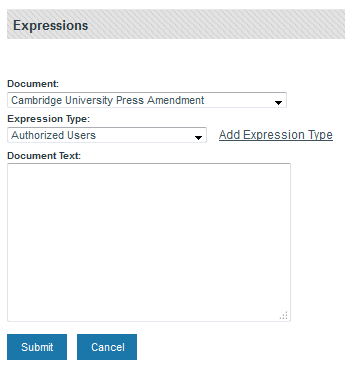 screenshot of the Expressions form. There are 3 fields.
- Document: The document name for which you want to add a new expression. The drop-down is pre-populated from the existing document names in the specific license record. This is a required field.
- Expression Type: The type of expression you wish to add (interlibrary loan terms, course pack rights, etc). This is a required field. The software comes with the following expression types already defined: Authorized Users, Confidentiality Clause, Course Packs, eReserves, General Notes, Interlibrary Loan, Jurisdiction, Multi-year Term, Post Cancellation Access, and Third Party Archiving. This field is customizable and you can add types by selecting Add Expression Type or going to Admin. In the Admin page, you can specify which expression types are for internal use and which ones can be displayed.
- Qualifier: This field will not be available if the selected expression type does not have a qualifier. This is a customization field which can be used to qualify particular expressions. For example, a qualifier of Permitted or Prohibited may be appropriate for an Interlibrary Loan expression. You may choose to ignore this field as it may not be appropriate for certain expression types or choose to use it in a different fashion for other expression types. The software comes with qualifiers added for Coursepacks and Interlibrary Loan.
- Document Text: The actual text of the license clause.
Adding Display / Internal Notes
Actual legal text can be quite confusing so the next step is to add Display or Internal Notes to hold an interpretation of the text of the clause.
There are two types of expression notes in CORAL Licensing: Display Notes and Internal Notes. You can set the note type to either Internal or Display for each expression type on theAdmin page detailed later in this document. Display notes are intended to be displayed outside the module, for instance in the Terms Tool, and there is a additional functionality built. Internal Notes are for internal use only and do not have additional display functionalities built in.
The Add/view Display Notes link opens a window which allows you to enter multiple display notes. It also displays the Document Text on that same window so that you can refer back to it while adding the notes. The sort order of multiple notes can also be adjusted through this same window.
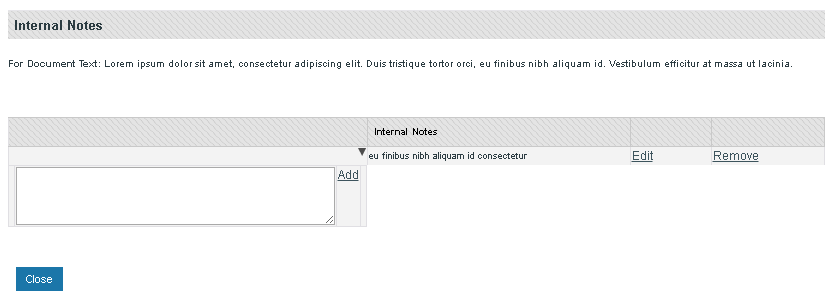 screenshot of internal notes window
In the below example, the Interlibrary Loan expression type has been set to use Display Notes and as such the expression is presented with an additional checkbox to the left of the Document Text.
 screenshot of display notes window
In this example, the Cambridge University Press License Agreement is being associated with the ‘Cambridge University Press Journals Complete’ target in SFX (‘Cambridge University Press Journals Complete’ is the SFX target public name). This SFX – License connection allows for the delivery of license terms through the SFX menu as detailed in the Terms Tool User Guide. This tab is meant to be used in conjunction with the Terms Tool and can be disabled for those who do not wish to use it.
For more information on the Terms Tool, go to the Terms Tool documentation.
Attachments
For any resource there may be documents in addition to the actual license that are important to retain. Title lists and email correspondence are two that may be the most common. The Attachments tab allows you to upload these additional documents to the license record.
 screen shot of attachments tab.
The date field is not automatically entered by the system. The intention of the date field was to be the date the attached document was received but since the date is manually chosen it can be any date of your choice. The View Attachment 1 link will open the uploaded file.
Licenses in Progress
 screenshot of Licenses in progress section. There is a table of licenses in progress.
The Licenses in Progress page will show the licenses that are not yet complete. It is intended to be used by the licensing staff as a queue of outstanding licenses. It has been coded to show licenses of status Awaiting Document or Editing Expressions and will also show new licenses which have not yet been given any status. The hyperlinked License Name will take you into the license record.
Expression Comparison
Expression Comparison allows the user to see all the instances of a specific expression type across all documents in a single screen or view. The Limit by Expression Type dropdown allows the user to select from among all defined expression types.
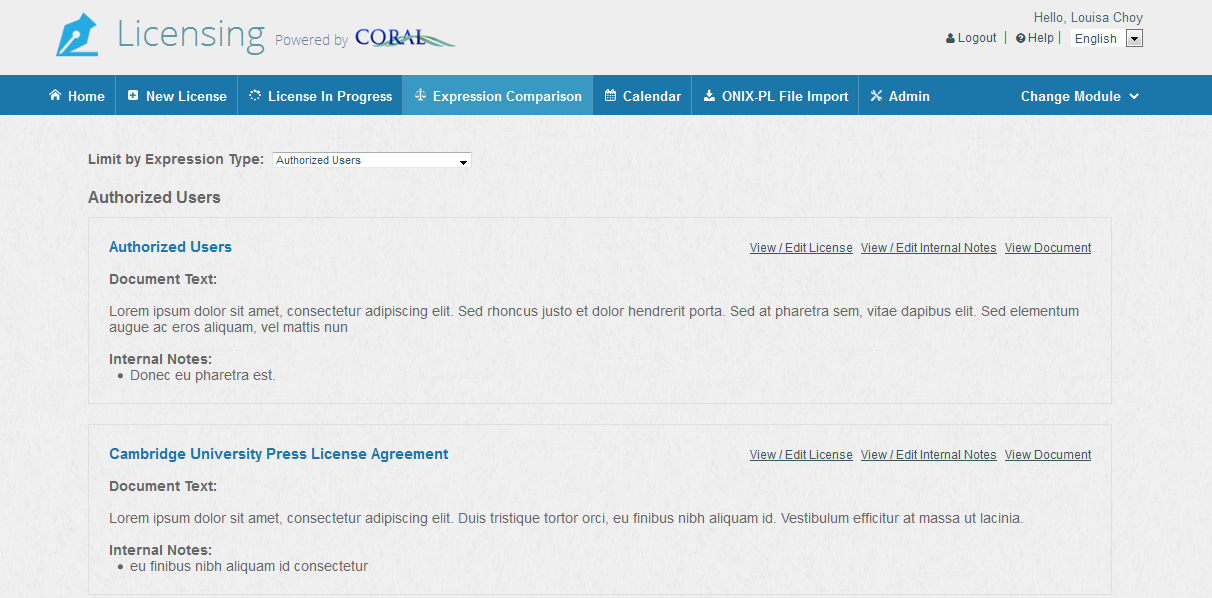 screenshot of expression comparison section
This allows licensing or relevant personnel to compare language for each expression type across all documents. It could be an immensely powerful tool when attempting to come up with recommended language during negotiations. The user may also add new internal/display notes, open the license record and open the actual document from this page.
Expression Comparison is intended for personnel that need quick access to all expressions in the system. Other library staff however, may only need access to specific types of expressions and this particular page may be information overload.
ONIX-PL File Import
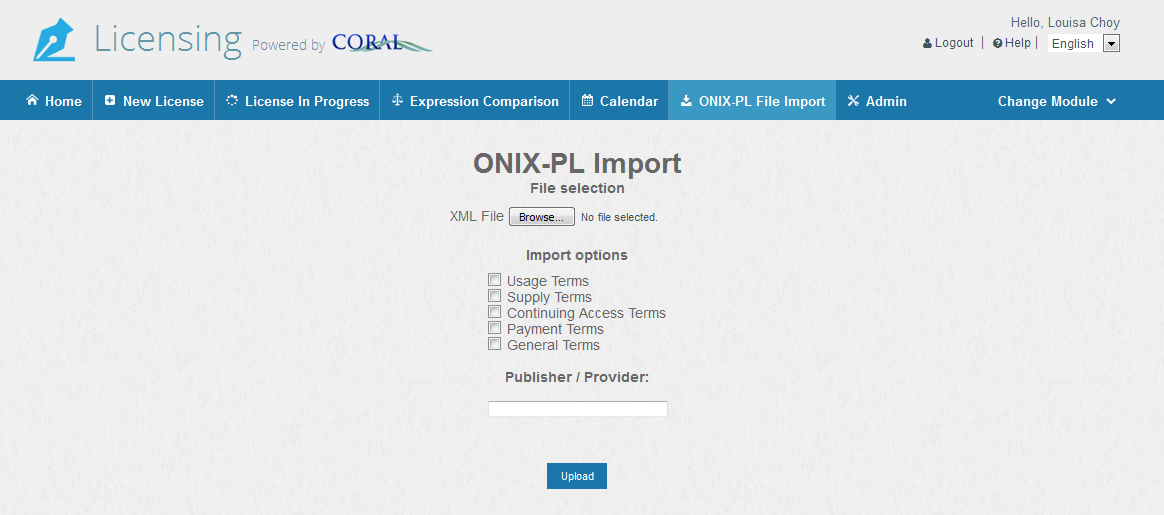 screenshot of ONIX-PL File Import section
You can upload licensing terms using the ONIX-PL File Import. ONIX-PL is a standardized XML format used to express license terms. The upload will create a new licenses with imported documents (in HTML format) and expressions. You can find such files in GOKb, an open data platform that provides information about electronic resources.
Admin
The Admin page is where you will edit Document Types, Expression Types, Qualifiers, Signature Types, Licenses Statuses, and Calendar Settings.
Each of these fields can have as many values as needed so that the system can better meet local needs.
Admin is also where you will edit and manage user permissions. CORAL Licensing has been built with the ability to limit access to select individuals given the confidential nature of license agreements. Users may not access CORAL Licensing until they are first set up with an account by an administrator. The following figure shows the ‘add new user’ window available from the Admin page.
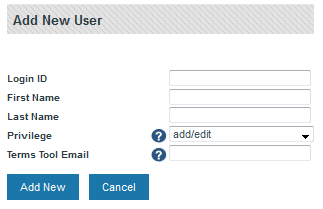 screenshot of the add new user window
Login ID: The user’s unique ID. If you’re using your local campus’s authentication system, the ID must match what is in there. See the technical documentation for more details on authentication.
Privilege: The user’s level of access.
- Admin users have complete add/edit rights and can remove licenses and associated fields. They also have access to the Admin page, the Terms Tool tab on the license record and the terms tool checkbox.
- Add/Edit users can remove licenses and associated fields, but not have access to the Admin page and the Terms Tool.
- View Only users can view all license information and are allowed access to the uploaded documents.
- Restricted users can view all license information but are not allowed access to the uploaded documents nor access the actual license agreements that have been uploaded to the system.
Terms Tool Email: Enter email address if you wish the user to receive email notification when the terms tool box is checked for a given expression. Leave this blank for all others.